what two methods are used to hide items from the finder?
macOS has a very interactive interface, which tin can initially take some fourth dimension to get used to just works pretty well. However, depending on how you like to work, some of its features may not play well with your personal workflow. Some bear witness distracting, while some might not piece of work equally you want them to. And so at that place are those that you don't want, demand, or use.
If you want to remove a characteristic from the organisation, you tin can try removing it or disabling it through Final or by using other exhaustive methods. Just information technology's usually much easier to only hibernate the feature. Today we'll become through all the main visual cues that y'all tin can choose to hide on your Mac.
The Dock
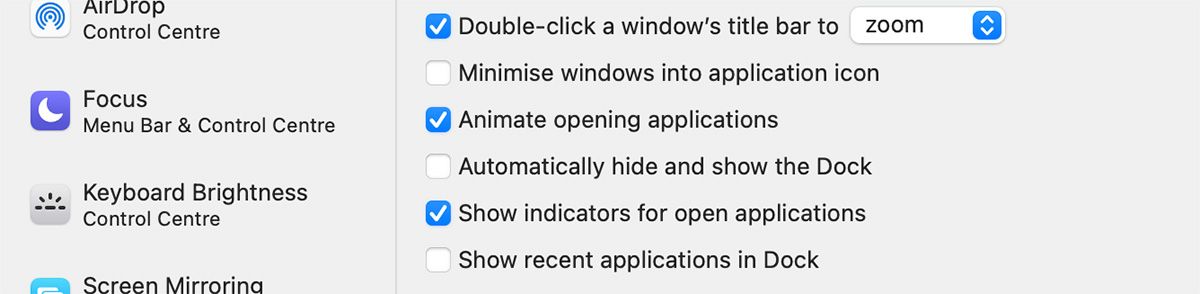
Some people may find the macOS Dock obstructive and distracting to their workflow. If this is the case, you can choose to hide your Dock until y'all motion the cursor to the bottom edge of the screen. Selecting Automatically hibernate and show the Dock under Arrangement Preferences > Dock & Menu Bar does the trick. Also, check the box for Minimize windows into application icon to forbid individual app windows from cluttering upwardly the dock.
Y'all can too control your Mac's Dock hiding with a shortcut (Option + Cmd + D). Actuate information technology from System Preferences > Keyboard > Shortcuts > Launchpad & Dock by selecting Plow Dock Hiding On/Off.
You lot tin can as well cull to hibernate the Menu Bar, similar to hiding the Dock. Check the Automatically hide and show the menu bar on desktop / in full screen options under System Preferences > Dock & Menu Bar depending on your preferences. This will continue the menu bar out of your manner. Movement your cursor to the height border of the screen when you want to admission the menu bar.

If y'all don't want to hide the complete Menu bar but want to de-ataxia it, you can choose to hibernate private organisation icons, such equally battery status and Bluetooth.
To do this, visit the relevant System Preferences pane and uncheck the Show [icon] in menu bar option. For instance, if y'all want to disable Bluetooth from the card bar, go to Organization Preferences > Bluetooth and uncheck Show Bluetooth in menu bar.
At that place's also a quicker mode to make clean up your menu bar! Agree downwards the Cmd key and drag unneeded system icons off the menu bar and release them when you encounter an Ten mark next to the cursor. This will delete them from the card bar. This method also works on the Engagement and Time brandish equally well as the fast user switching menu item in the status bar.
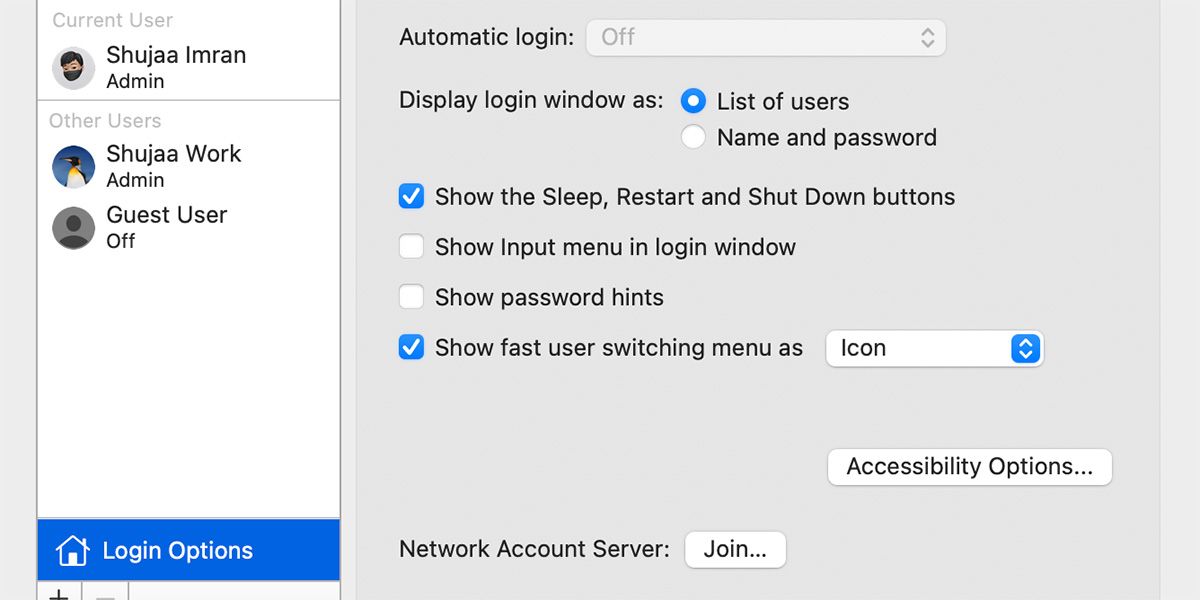
You can also hide the user switching bill of fare from Organization Preferences > Users & Groups > Login Options. You lot accept to uncheck the Bear witness fast user switching card every bit checkbox.
In that location are a few fixed icons—yous tin't budge the Spotlight icon, the Notification Center one, or third-party app icons. You'll need an app to brand them disappear. Vanilla (Free) is the simplest choice. Endeavor Bartender ($15) for more control over hiding options.
Open Apps
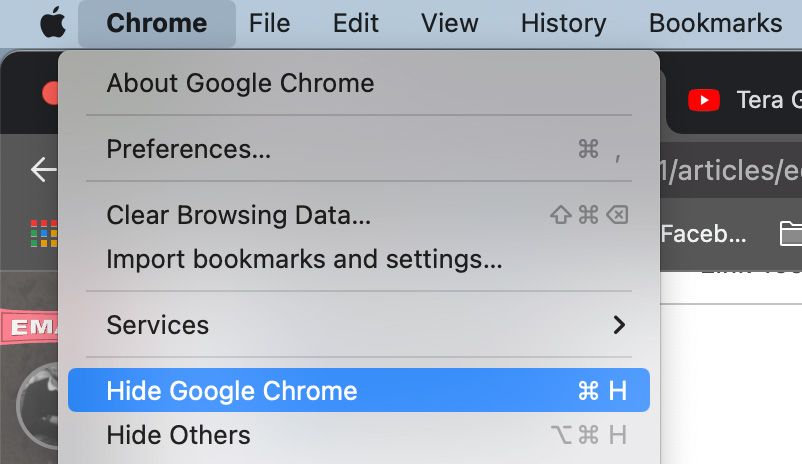
The easiest way to make open windows disappear is to press Cmd + H to brand the active application disappear. It won't even prove up in Mission Command.
Yous can also hide a Mac app from the app-specific menu that'southward available in the top menu bar betwixt the Apple icon and the File options. Click on the app name and select Hide [App Name] from the menu. You can likewise select Hide Others if you want all the apps except for the current one to disappear.
Minimizing an app is dissimilar from hiding an app, equally minimizing works one window at a time while hiding the app works on all its windows at in one case.
Too, you tin bring back subconscious apps via the app switcher past hitting Cmd + Tab. However, you lot tin't revive minimized apps this mode. You'll take to click on the relevant app icon in the dock to restore the app. It's ever the oldest app window that shows upwardly, regardless of the order in which you lot minimized the windows.
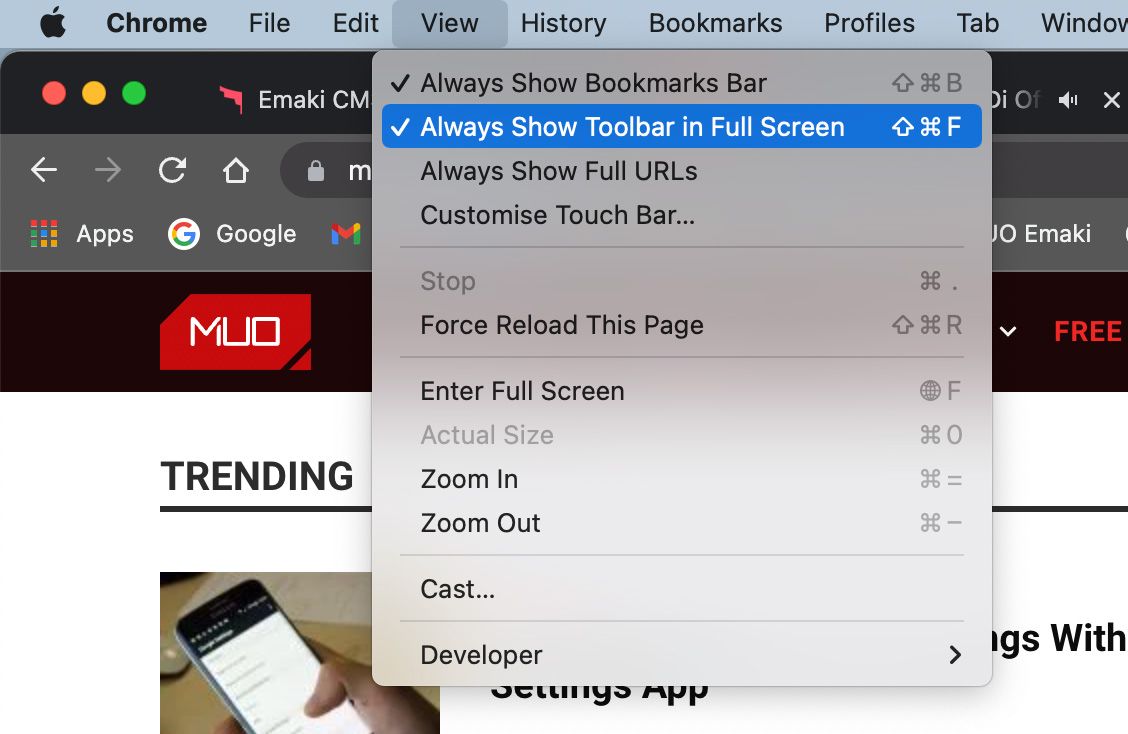
In all macOS applications, the quickest mode to customize the toolbars is by using the View menu. By toolbars, nosotros mean the tab bar, sidebars, the title bar, and so on.
Certain toolbars are besides application specific. For example, the Path Bar in Finder, the Reading List Sidebar and Favorites Bar in Safari, the Folders sidebar in Notes. As you switch between apps, the View menu gets updated to lucifer the active app.
If you're looking for a quick shortcut, expect for the keyboard shortcut listed next to various options in the View carte and memorize the ones for the toolbars you toggle oftentimes. You can also create custom shortcuts if you tin never remember the default ones.
Third-party apps likewise use the View carte to give you command over toolbars. Some apps scatter the toolbar controls across multiple menus. In most cases they're easy plenty to find. You tin can also (usually) hide individual sidebar elements via the Control-click menu.
If y'all know how to hide menu bar icons, yous know how to get rid of toolbar icons—the process is similar. You tin can concur Cmd and elevate the icons off the toolbar i past one.
Sidebar Contents in Finder
To hibernate a sidebar item in Finder, all you lot have to do is click on the Remove from Sidebar selection from its Control-click menu. This works for the sidebar items nether all the four sections: Favorites, Shared, Devices, and Tags.
You can too do abroad with sidebar elements by Cmd-dragging them one by one out of the sidebar. Release the item only afterwards y'all run into an X mark side by side to it.
If you want to go rid of a bunch of sidebar items at once, try this faster method instead. Under Finder > Preferences > Sidebar, uncheck the box corresponding to each item you would like to hide. This only works for the system-specified sidebar items (except for tags). Yous'll have to employ one of the two methods above if you lot want to hide custom sidebar folders.
For sidebar tags, yous'll have to visit Finder > Preferences > Tags and go through the whole unchecking process in that location.
You can't hide some of the bones options that announced in various Control-click menus on Mac. For case, Get Info in Finder or Reload Page in Safari. Hither'due south what you lot tin hide: services, favorite tags, and Share bill of fare extensions.
The services you encounter listed in whatsoever Control-click menu depend on what yous have clicked or selected. You'll run into these same services under File > Services for the active app.
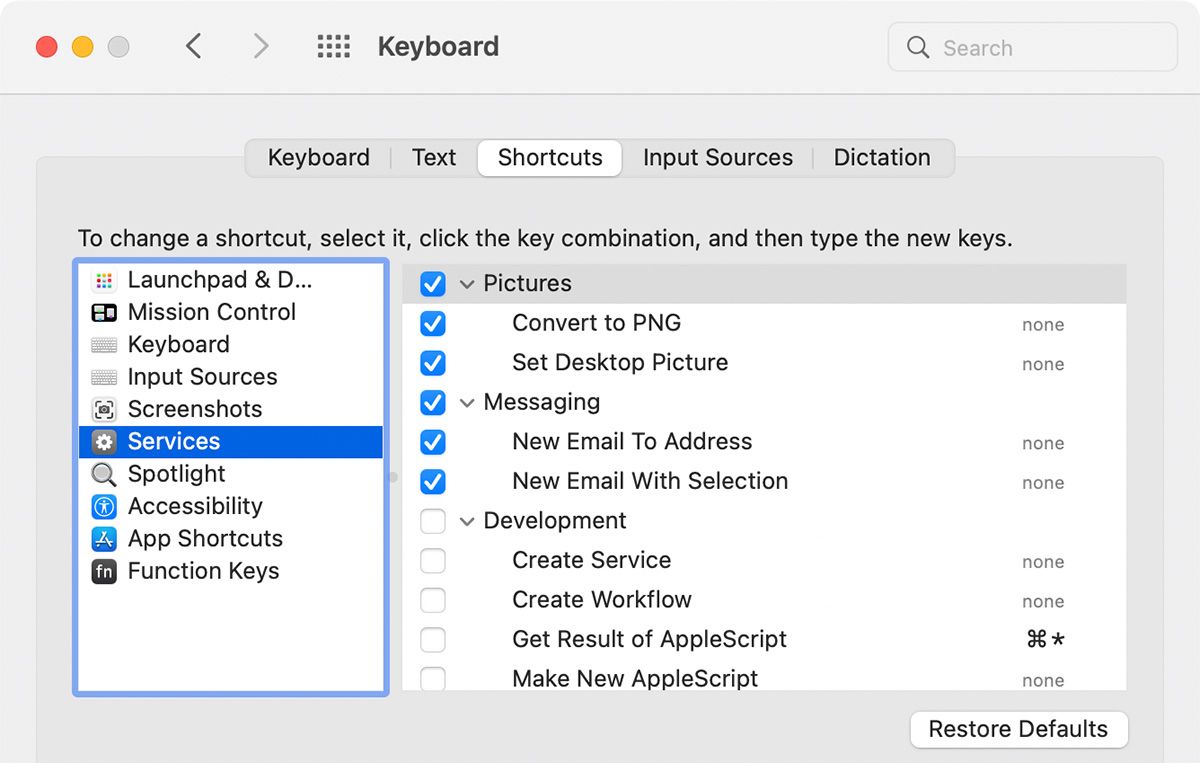
Y'all tin remove services from your Mac's Control-click menu in Organization Preferences > Keyboard > Shortcuts > Services. Services that you take created using Automator and the ones that come bundled with third-political party apps too prove upwardly in this list, and yous can hide those too.
Let's tackle the tags marked equally Favorites at present. These are the colorful bubbles in the Control-click carte du jour for Finder folders and files. Yep, it's handy to take the ones you apply almost often in this list, but the rest may be distractions, and you might want to get rid of them.
Hibernate all but the near used tags from the Command-click menu via Finder > Preferences > Tags. Drag the ones you don't need out of the Favorite Tags section.
Desktop Icons
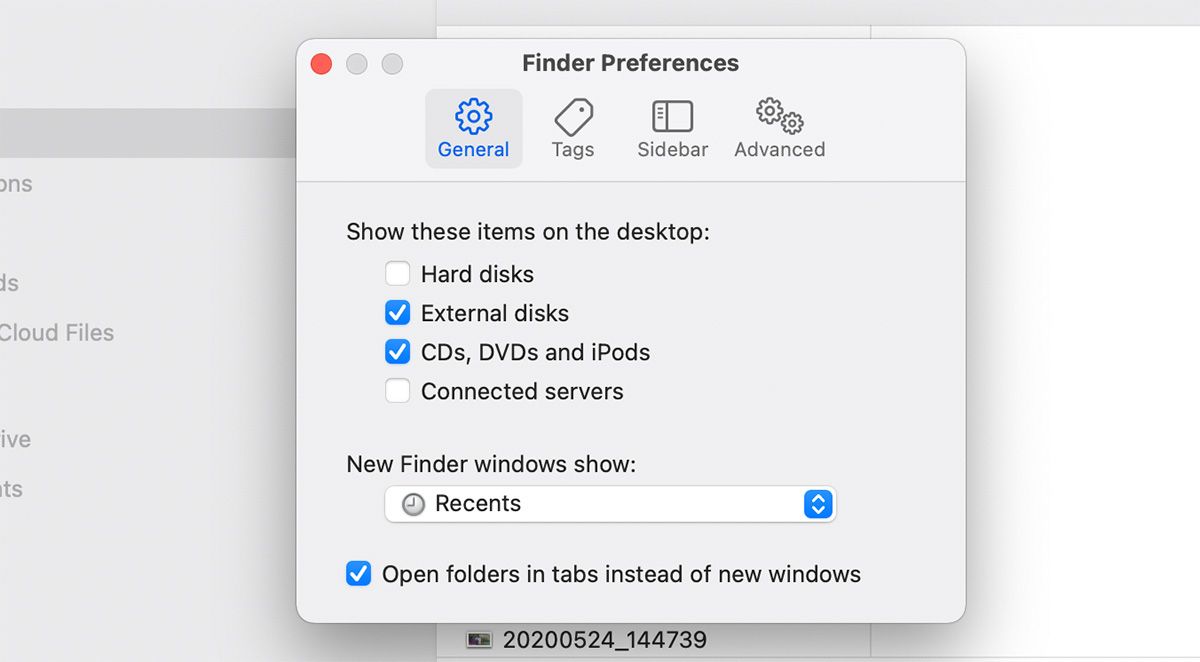
Y'all tin cull to hide desktop items like hard disks and external drives on your Mac. If you want to hide desktop shortcuts, uncheck the relevant box under Finder > Preferences > General.
As for the other desktop icons (such equally file, folder, or app shortcuts) you lot tin hide them from the desktop by moving them to another folder on your Mac. Since they're shortcuts, and not actual files, deleting them is also harmless. Yous tin can admission the original files either from Finder or Spotlight.
Another option is to use Stacks to keep your desktop cleaned upwards and tidy. Stacks accommodate all your desktop files according to categories, which expand to reveal all the files when you click on them.
If you want to hide all your desktop icons, you tin can do and so with a couple of Terminal commands. Open the Terminal application and execute the post-obit control:
defaults write com.apple tree.finder CreateDesktop false Adjacent, relaunch Finder with this command:
killall Finder To restore the icons to the desktop, repeat the commands above, replacing false with true in the first command.
Now for the like shooting fish in a barrel way out! Get an app like HiddenMe (Gratuitous, in-app purchases available) to banish icons from the desktop with a single click or hotkey. Also, be sure to read this guide on cleaning up your Mac desktop to increase productivity.
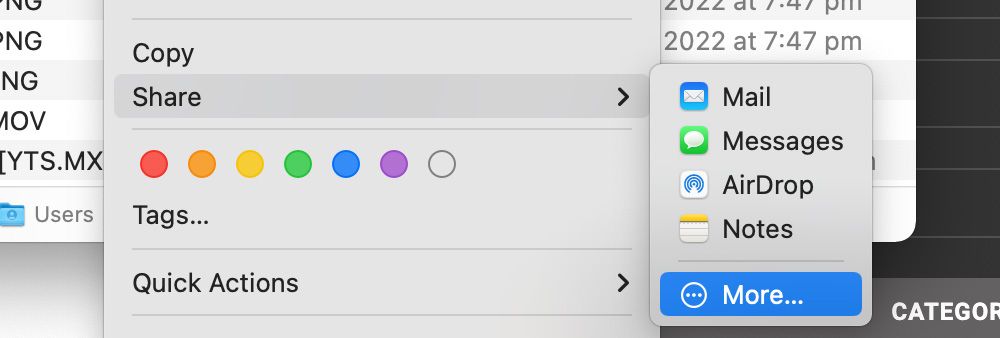
The Share carte du jour pops upwardly in iii places within diverse apps on your Mac: the File menu, the toolbar, and the Control-click menu. It allows yous to easily share items to specific services, which you tin choose to disable if you want.
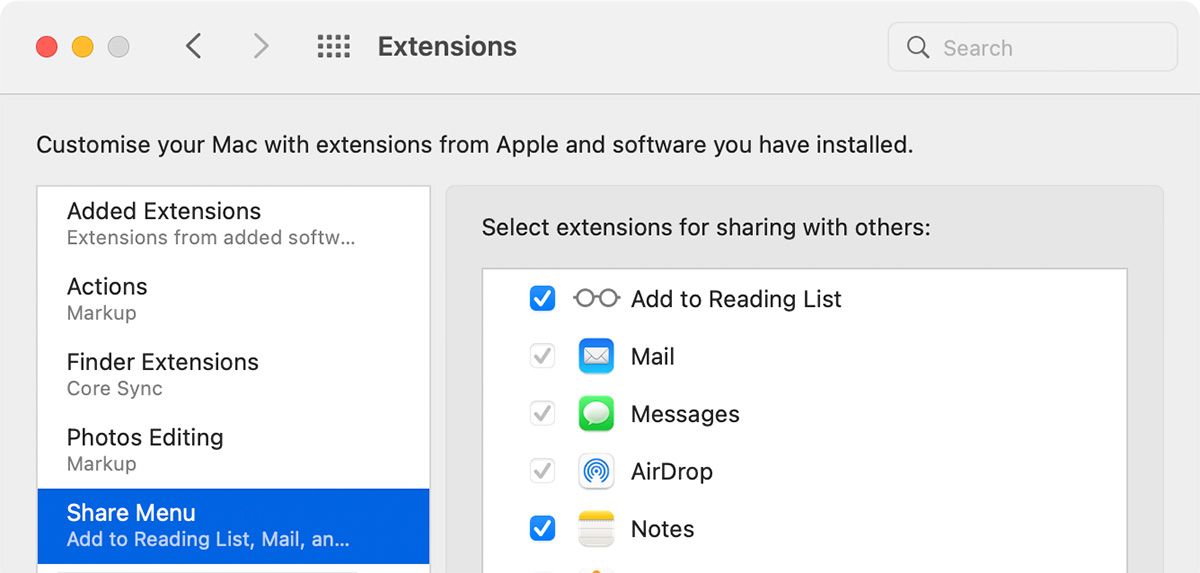
To hibernate some options in the Share menu, caput to Organisation Preferences > Extensions > Share Menu and deselect their checkboxes. A few of the options aren't editable though and will appear grayed out.
Yous tin can too jump to the Share menu settings by clicking on the More option in the menu itself.
Any changes you brand to the Share menu go reflected across your Mac, only only if they're relevant to the app you lot're viewing. For instance, social media share options don't evidence up in the Finder Share menu. Likewise, the Notes pick is missing from the Share menu when you're already using the Notes app.
Click on the Edit Widgets push in the Notification Center to hide any of the widgets on brandish (or to add together some). Next, click on the minus (–) sign side by side to each of the widgets you lot want to get rid of and hit the Done button at the end to wrap up.

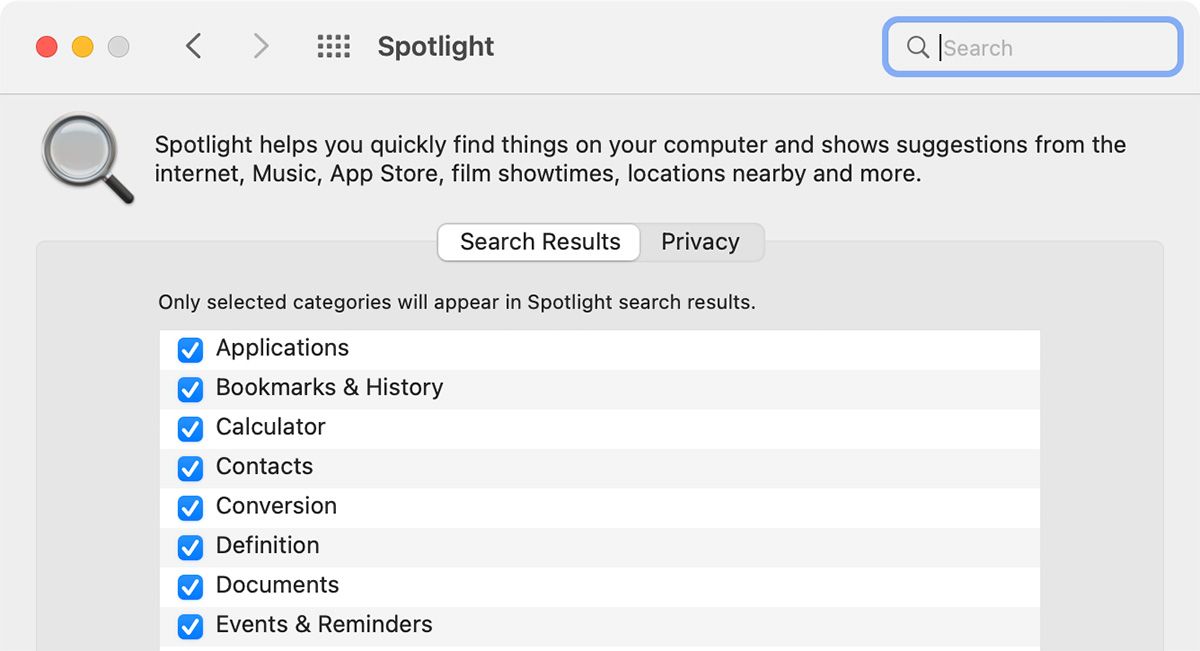
Spotlight Categories
Spotlight splits upwards your search results into multiple categories like Applications and Documents. You probably don't demand all of them, so y'all might want to hide the unnecessary ones. Disable them from System Preferences > Spotlight > Search Results and you lot're good to go.
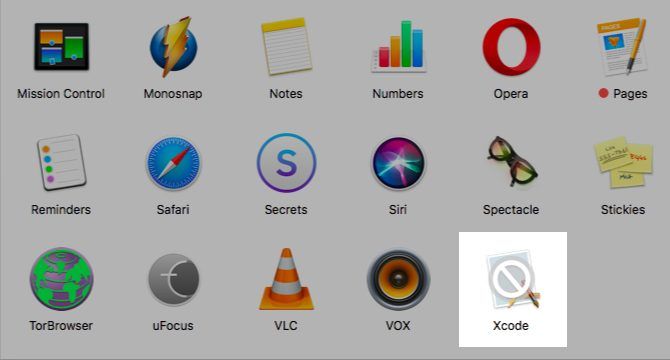
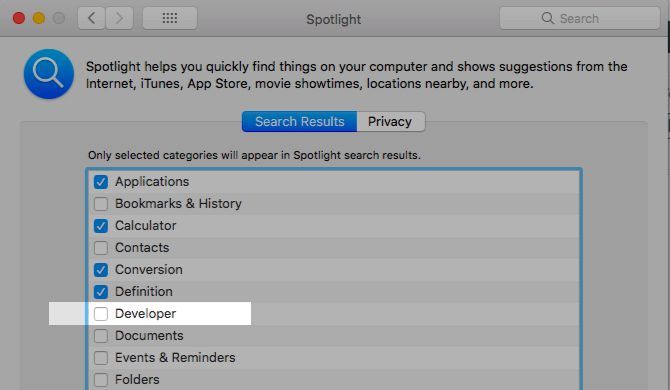
The Developer category is a tricky one if you lot don't take the Xcode application installed. You won't see this category listed in the settings, but you lot can force information technology to announced with a quick workaround. Open the Terminal app and execute this command:
cd /Applications Run this command next:
touch on Xcode.app With these commands, you're fooling your Mac into thinking that you lot have Xcode installed. (If you open up the Applications binder, you'll see an app named Xcode, which is an empty file.)
Now you should be able to encounter the Programmer category listed under System Preferences > Spotlight > Search Results. If information technology doesn't show up, restart your Mac. Deselect the category to stop information technology from showing up in Spotlight search. Switch to the Privacy tab in the Spotlight settings pane to add folders that you would like to keep out of search results.
Files and Folders
It doesn't matter if you're hiding Finder information because it's getting in the manner or because it'southward sensitive; you lot need a go-to workflow for it. The default method for hiding files and folders on a Mac involves Terminal commands.
Hit Cmd + Shift + Catamenia (.) in Finder if all you desire to do is make hidden files visible. Hit the shortcut again and the files go back to being invisible.
For the odd file you desire to keep hidden, create a new folder in your user library (~/Library) and stash the file there. Since Spotlight doesn't index the user library, your hidden files are rubber. That is until someone who knows how to access the user library stumbles upon them or goes in search of them. Not a foolproof solution, as you can see.
If y'all deal with subconscious data often, consider installing a signal-and-click app like Hide Folders (Free, premium version available) or DesktopUtility (Free, premium version available). These apps will speed up the process of creating hidden files and toggling their visibility. You tin also choose to create a new encrypted book on your Mac'due south SSD, which will let you to keep your data secure.
Notifications
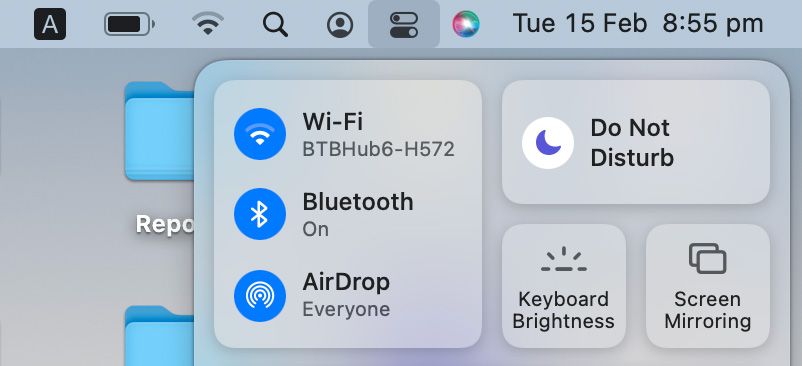
These days, notifications are public enemy number i. Thankfully, you can silence them all with the flick of a switch from the Control Center! Click on the Command Centre icon from the menu bar and activate the Do Not Disturb mode.
Even when the Do Not Disturb is inactive, it'south all-time to hide notifications that are annoying or you don't demand. You can practise this from System Preferences > Notifications & Focus. Go through each app listed in the sidebar and customize how and where its notifications show up.
To hibernate the notifications for an app completely, simply disable the checkbox for Permit Notifications. If you simply want to customize an app notification and not disable it completely, yous can cull to exercise so with the following options:
- Silence the sound cue notifications (Play audio for notifications).
- Hide the icon badges that bear witness upward in the dock to say "You've got an update!" (Bluecoat app icon).
- Prevent notifications from showing up in the Notification Center (Show in Notification Centre).
- Hibernate notifications from prying eyes by banning them from the lock screen (Show notifications on lock screen).

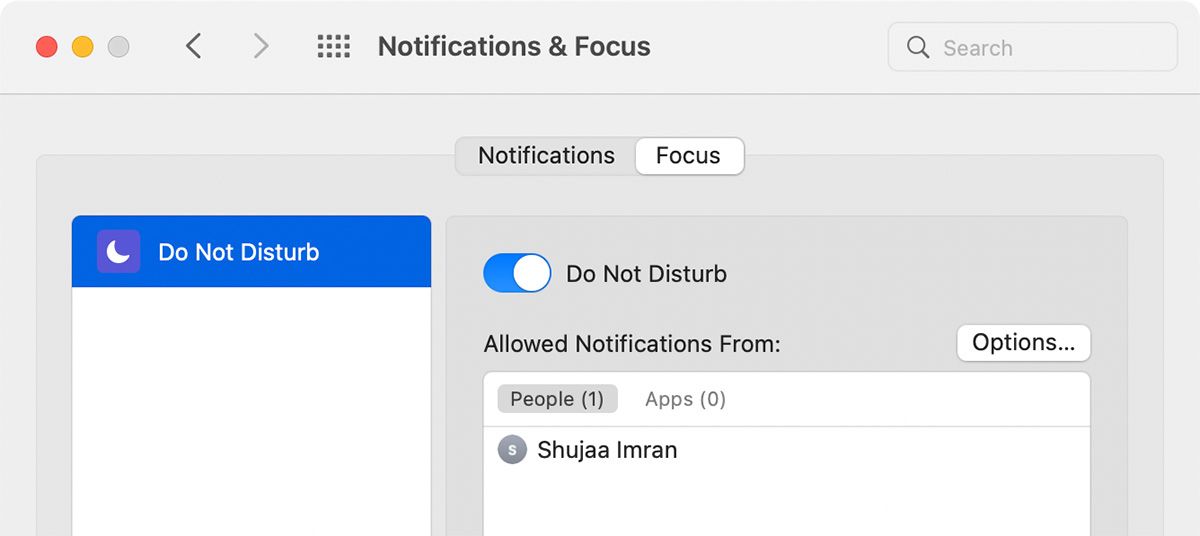
If you want to allow a specific person to be able to contact you lot during the Practise Not Disturb way, click on the Focus bill of fare and add the specific contact to the listing of allowed notifications.
File Extensions
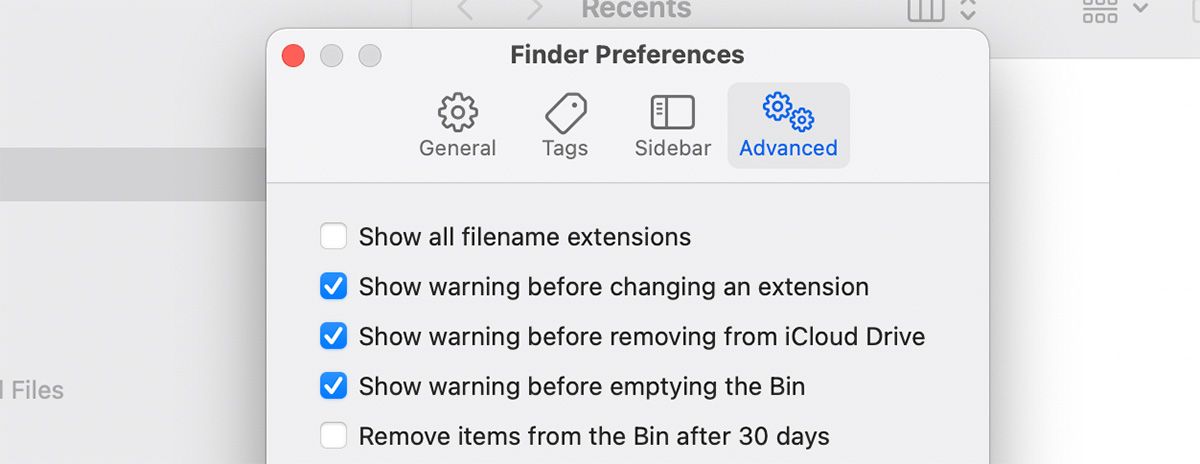
If yous want Finder to hibernate extensions from filenames, disable Prove all filename extensions from Finder > Preferences > Avant-garde. Now you lot'll see only the filenames, unless you have explicitly added extensions while naming or renaming specific files.
Finder Particular Info
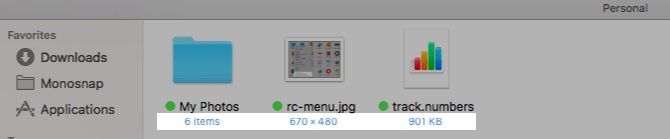
Finder displays extra data for files and folders right below their names in the Icon view. For instance, the file size for documents, the prototype size for photos, and the number of items within folders.
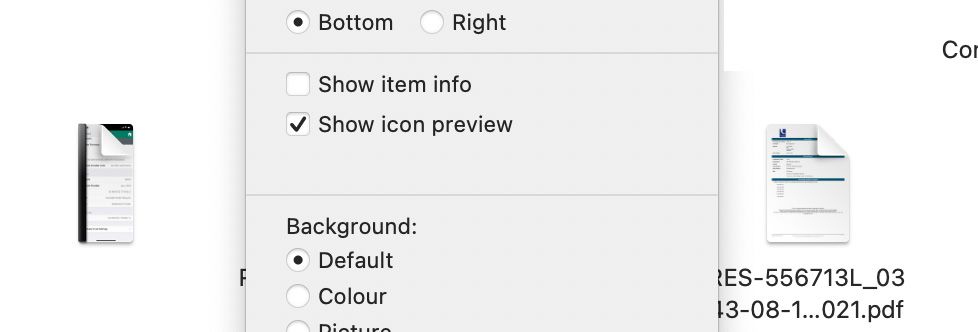
That information is pretty useful, but if you would rather hide information technology, open up View > Show View Options and uncheck all the boxes for Prove item info. This setting works on individual folders opened with the Icon View and not across Finder.
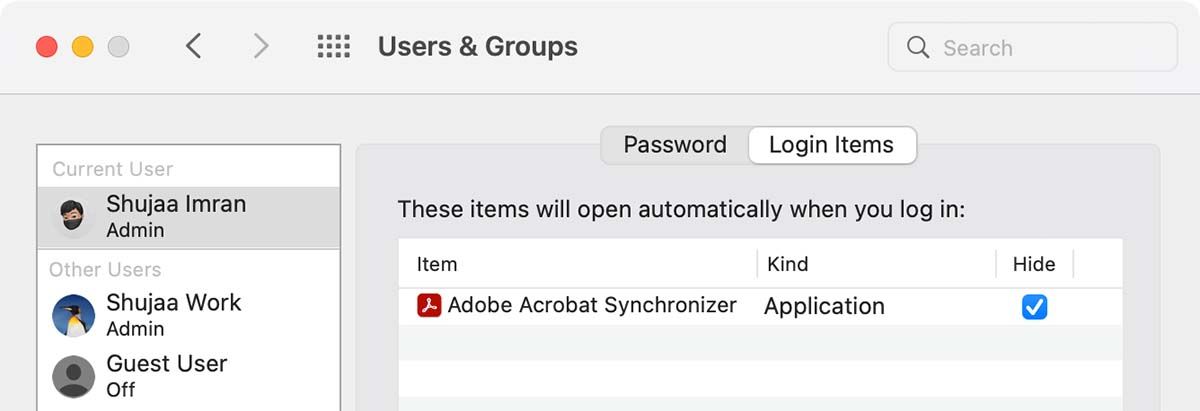
App Windows for Login Items
Yeah, you might demand certain apps to launch at login, but practice you lot need to meet their windows pop up every time you start your Mac? Probably not. You can hide these from the Login Items section in Users & Groups. Open up upwards System Preferences > Users & Groups. Select the electric current user from the sidebar and switch to its Login Items tab.
Now, for any detail whose windows you don't want to run across later on logging in, select the checkbox in the Hibernate column. Your Mac volition still launch these apps at login, but in the background.
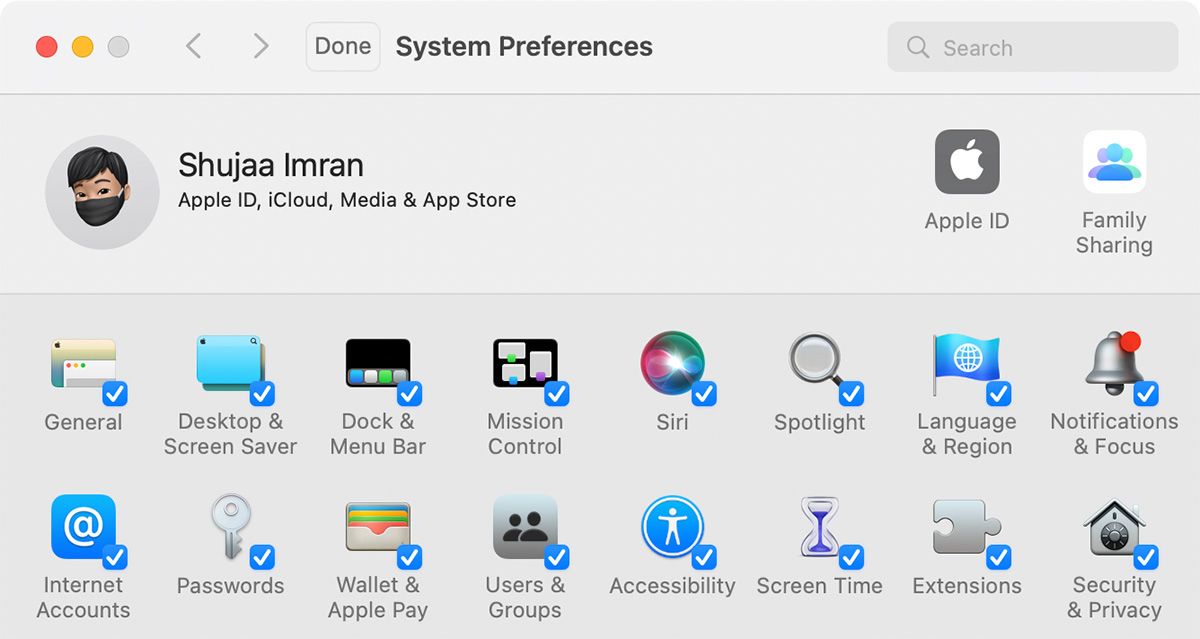
System Preferences Panes
If you peek into the View card when you take System Preferences running, yous'll notice a Customize option there. Click on it, and you'll be able to declutter the preference panes yous don't use frequently. Hit the Done button in one case you have finished deselecting the checkboxes for the panes you want to hide.
The Launchpad
The Launchpad feature on your Mac is every bit good every bit extinct and already out of the way. If you would like to hide it farther, disable its trackpad shortcut from System Preferences > Trackpad > More Gestures. Adjacent, unlink its hot key from Organization Preferences > Keyboard > Shortcuts. Launchpad will keep to stay accessible via Spotlight though.
App-Specific Features
Each application usually comes with a few elements that are unique to information technology. For example, Safari has a Develop carte du jour, the Mail app comes with list previews and so on. To hide such elements, y'all'll have to dig around a scrap in the Preferences section or the View carte du jour of the app in question.

Out of Sight, Out of Listen
Nosotros all know the benefits of immigration out the ataxia in all its forms, but nosotros frequently dismiss visual clutter every bit inconsequential. It'due south not, which is something we discover after nosotros deal with it. Using this guide, yous should be able to reduce all the visual distractions from your Mac and digitally tidy upwardly your Mac.
About The Writer

Source: https://www.makeuseof.com/tag/hide-anything-mac-productivity/
0 Response to "what two methods are used to hide items from the finder?"
Post a Comment